
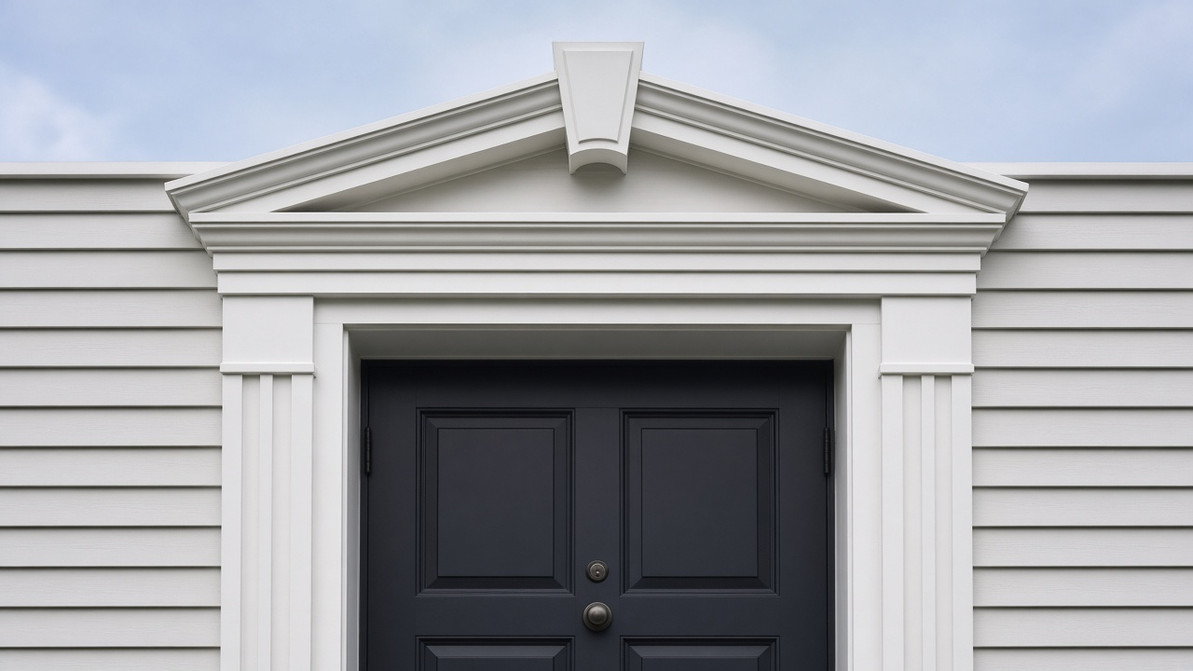
How to Install Spectis Pediments and Keystones
Pediments and keystones are two of the fastest ways to give a plain window or entry door real presence. A peaked or arched pediment sets the frame; a keystone anchors it. Both are lightweight, factory-primed HDP urethane, so they install with basic tools and no special equipment — but a little planning up front makes the difference between a crisp, symmetrical installation and one that looks slightly off from the street.
Before You Start
- Confirm that the width of your pediment or crosshead matches the outside width of your window/door trim (casing to casing), not the rough opening.
- Dry-fit the piece against the wall before mixing or applying any adhesive. Check for level and confirm your centerline.
- Mark the centerline of the opening on the wall and on the back of the pediment. This is the single most important step — everything else is measured from it.
Step 1: Establish the Centerline
Measure the width of the casing/trim below the pediment and mark the exact center point on the wall, a few inches above the top of the casing. Do the same on the back of the pediment itself. When you set the piece in place, these two marks should line up.
Step 2: Dry-Fit and Support
Before adhesive goes anywhere, hold the pediment in its final position (a helper or temporary ledger board works well here) and confirm:
- It sits flush against the wall with no rocking
- The centerlines align
- It's level side to side
If you're installing over siding or an uneven substrate, you may need to shim the back of the pediment so it sits flat and doesn't stress the material.
Step 3: Apply Adhesive
Apply a bead of ADH100 adhesive to the back of the pediment, keeping it about an inch from the outer edges so it doesn't squeeze out visibly once set. Press the piece into position using your centerline marks, and hold or brace it until initial tack sets (typically 15-20 minutes, though full cure takes longer — check the adhesive label).
Step 4: Mechanical Fastening
Adhesive alone isn't enough for anything mounted vertically or exposed to wind load. Back up the bond with corrosion-resistant trim screws driven through the body of the pediment into solid framing or blocking behind the wall surface, not just into siding or sheathing. Countersink screw heads slightly below the surface — you'll fill them during finishing.
Step 5: Installing the Keystone
Keystones typically sit centered over an arch, crosshead, or header, and are installed the same way: centerline first, dry-fit, adhesive, then mechanical fasteners. Because keystones are a focal point, take extra care with the centerline check here — an off-center keystone is one of the most noticeable installation mistakes on a facade.
Step 6: Finish
Fill screw holes and any seams with an exterior-grade filler, sand smooth, and prime and paint per Spectis' finishing instructions (see our Finish Spectis Urethane Products post). This is also required to keep the installation covered under warranty.
A Note on Combining Pieces
Pediments are often paired with crossheads, arch trim, or sunbursts to build a complete entrance surround. When combining multiple pieces, dry-fit the entire assembly first and confirm every centerline before any adhesive is applied — it's much easier to adjust a dry assembly than one that's already tacked to the wall. To size a pediment and matching pilasters to your opening, see How to Install Pediments and Pilasters.
*Spectis makes no guarantee as to the suitability of any product on a specific project or application. Before ordering and installing pediments, keystones, or any other product, consult a design professional to confirm proper sizing and load requirements for your structure.*
Recent Posts
-

Types of Mouldings: A Visual Guide
Mouldings are the trim that finishes a room or a facade: they cover joints, frame openings and add …Oct 10th 2026 -

What Is a Corbel? Types, Sizes & How to Choose Exterior Corbels
Corbels are one of the oldest details in architecture, and one of the easiest ways to add depth and …Oct 10th 2026 -

Ceiling Medallion Sizes: How to Choose
A ceiling medallion is one of the simplest ways to make a light fixture look intentional and to give …Oct 10th 2026